IP blacklist is a method of filtering out malicious or illegitimate IP addresses from accessing your network. It involves creating lists to block specific IPs and is used in conjunction with firewalls and other security tools.
Your IP can get blacklisted through methods like IP address changes, IP spoofing, botnets, false positives, and inaccurate IP detection. These challenges highlight the need for robust security measures beyond blacklisting alone.
To remove your IP from a blacklist, identify the blacklist, address the issue, request delisting, and monitor your IP’s reputation. To blacklist an IP, determine the need, choose the right method, create the blacklist, apply it, and regularly update it. Reputation intelligence complements blacklisting but does not eliminate its importance.
Discover what an IP blacklist is, how your IP can get blacklisted, how to remove your IP from a blacklist, and learn the steps to blacklist an IP address. Stay informed and protect your network from malicious activities.
What is an IP blacklist?
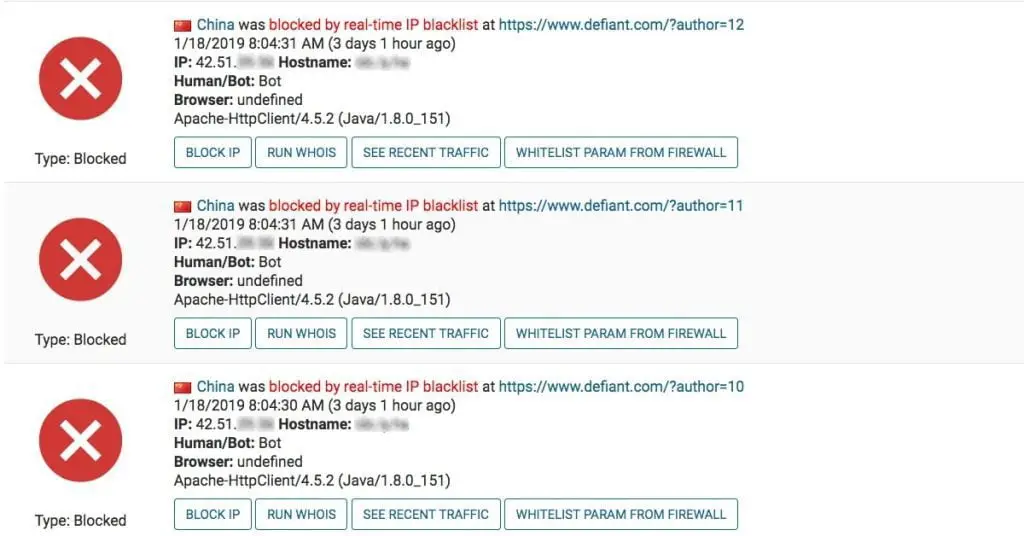
IP blacklist refers to the practice of filtering out illegitimate or malicious IP addresses from accessing your networks. It involves creating lists, commonly referred to as blacklists, that contain ranges or individual IP addresses you want to block.
These blacklists are implemented in conjunction with firewalls, intrusion prevention systems (IPS), and other traffic filtering tools. By utilizing blacklists, you can effectively filter out malicious traffic based on policies or by manually adding IP addresses.
Network security tools equipped with blacklisting capabilities can also automatically update and block newly identified malicious IP addresses.
IP blacklisting acts as a robust defense mechanism to protect your network from potential threats.
How Can Your IP Get Blacklisted?
Understanding how your IP can end up on a blacklist is crucial to maintaining network security.
Attackers have devised various methods to circumvent blacklisting measures, making it important to stay vigilant. Here are some common ways your IP address can get blacklisted:
Changing IP addresses: Malicious actors often change their IP addresses periodically to avoid being blacklisted.
They may possess a range of addresses at their disposal, enabling them to swap addresses if they discover that one has been blocked.
This evasive tactic not only makes it harder to track attackers but also reduces the risk of prosecution.
IP spoofing: In certain network layer attacks, such as DDoS attacks that don’t require a full three-way TCP connection, attackers employ IP spoofing.
This technique enables them to appear as though they are connecting via a different IP address, bypassing blacklisting measures while obscuring their true identity.
It can also deceive monitoring systems into perceiving compromised credentials as legitimate.
Botnets: Many attackers operate vast botnets, consisting of thousands to millions of compromised end-user devices or Internet of Things (IoT) devices.
These botnets serve as a means for carrying out attacks, and the IP addresses associated with them constantly change as devices join or leave the network.
IP blacklists alone cannot effectively defend against these distributed attacks.
False positives: While implementing blacklists, there is a possibility of encountering false positives. These instances occur when legitimate users or activities are mistakenly identified as malicious, potentially disrupting productivity.
Inaccurate IP detection: In cases where multiple individuals share the same IP address, it becomes challenging to ascertain the actual end-user behind a specific IP.
With dynamically assigned IP addresses, there is no way to determine who the current user is.
Blocking an IP due to abusive actions may inadvertently prevent a legitimate user from accessing your network in the future.
How Do You Remove Your IP From a Blacklist?
Finding your IP address on a blacklist can be a concerning discovery, but there are steps you can take to rectify the situation.
Here’s a guide to help you remove your IP from a blacklist:
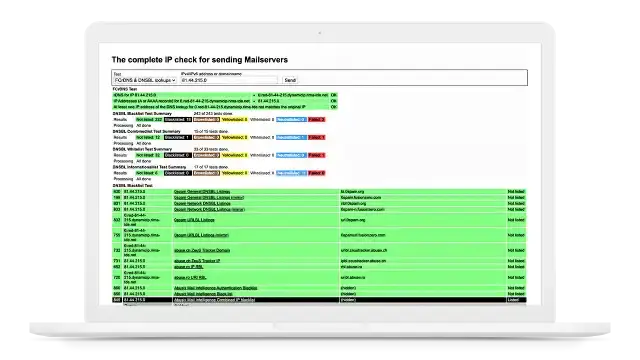
Identify the blacklist: Start by determining which blacklist has flagged your IP address. You can use online blacklist lookup tools to perform a comprehensive search across multiple blacklists.
Assess the reason for blacklisting: Each blacklist has its criteria for listing IP addresses. It is essential to understand the reason behind the blacklisting. Common factors include suspicious activities, spamming, or hosting malicious content.
Address the issue: Once you’ve identified the reason, take appropriate action to rectify it. This may involve securing your network, removing malware or malicious files, or resolving any issues that led to the blacklisting.
Request delisting: After resolving the underlying problem, reach out to the blacklist operator to request delisting. Provide any necessary evidence or documentation to support your case. Follow their guidelines and procedures to ensure a successful removal from the blacklist.
Monitor your IP’s reputation: Regularly monitor your IP address’s reputation by using reputation intelligence services. This proactive approach can help you identify potential issues early on and take prompt action if necessary.
By following these steps and maintaining a strong security posture, you can successfully remove your IP address from a blacklist and protect your network’s reputation.
How to Blacklist an IP Address
Knowing how to blacklist an IP address can empower you to proactively defend your network against potential threats. Here’s a simple guide to help you blacklist an IP address:
Determine the need: Assess the situation and determine whether blacklisting the IP address is necessary.
Reasons may include identifying and blocking malicious IPs, preventing access from anonymous proxies or TOR networks, or restricting traffic from known phishing URLs.
Choose the right method: Select a suitable method for implementing the blacklist. This can be achieved through firewalls, intrusion prevention systems (IPS), web application firewalls (WAFs), or other traffic filtering tools.
Ensure that your chosen method aligns with your network infrastructure and security requirements.
Create the blacklist: Compile a list of the IP addresses you wish to blacklist. This can include individual addresses or ranges. Consider leveraging reputation intelligence data to enhance the effectiveness of your blacklist.
Apply the blacklist: Implement the blacklist within your selected security tool or system. Follow the provided instructions to ensure proper configuration and activation.
Regularly update the blacklist: Stay proactive by regularly updating your blacklist. Monitor emerging threats, gather intelligence, and adapt your blacklist accordingly.
Continuous maintenance ensures that your network remains protected against evolving security risks.
By following these steps, you can leverage IP blacklisting as a potent defense mechanism and fortify your network’s security.
Additional FAQs
Q: Can an IP address be removed from all blacklists simultaneously? A: No, the delisting process varies across different blacklists. You need to address the specific requirements of each blacklist individually.
Q: Are there any services that can help monitor IP blacklists automatically? A: Yes, several reputation intelligence services provide real-time monitoring and alerts for blacklisted IP addresses, helping you stay informed and take timely action.
Q: Can reputation intelligence eliminate the need for IP blacklisting? A: While reputation intelligence is a valuable tool for enhancing network security, IP blacklisting still plays a crucial role in filtering out known malicious IPs and entities.
Conclusion
As cyber threats continue to evolve, implementing robust security measures is essential to safeguarding your network. IP blacklisting serves as a proactive defense mechanism against illegitimate or malicious IP addresses.
By understanding the concept of IP blacklisting, how IPs end up on blacklists, and the steps to remove or blacklist an IP address, you can effectively protect your network from potential threats.