Let’s say you have an old computer and you want to connect it to your wireless network, but it just doesn’t have any wireless capabilities in it.
Well, a Wireless Network Adapter is what you need.
Keep reading and learn everything you should know about Wireless Network Adapters (such as what they are, what they do, and how to install one yourself).
And if in the end, you are still not clear on the subject, then we offer to answer all your related questions for free. Request your consultation here.
Wireless adapters come in many different kinds, shapes, and forms, changing according to their functionality and wireless standard. In most cases, they look like small USBs (at least the most recent versions) which means you can just plug them into your computer and almost forget about it.
Why do you plug it in, you may ask?
Well, their little wireless radio antenna connects to your hot spot, to your router, or to a public network like the one in your local coffee shop or nearby airport to connect to a wireless network (in case your computer doesn’t have any installed) or to improve the wireless capabilities of the internal WiFi card that we normally have.
In 2022, there are currently two different types of USB WiFi adapters:
a) USB 2.0 Support: This type of adapter is the lowest range and the cheapest, so it won’t provide us with much real speed, although we will have better coverage (as long as it has external antennas). Generally, when we buy a WiFi adapter with USB 2.0, the WiFi standard that we will use will be WiFi 4, that is, it will be compatible only in the 2.4GHz band.
There are some exceptions with USB 2.0 WiFi cards compatible with entry-level WiFi 5.
b) USB 3.0 Support: These will always be the fastest but logically, being the highest-end devices, are also the most expensive. However, there are USB 3.0 adapters that have a great value for money, and that incorporate WiFi 5 with selectable dual-band and AC1200, which are the more usual.
If you ever want something higher-end, then there’s the AC1900 or another one in a similar class, which incorporates three internal WiFi antennas. However, in the case of making it small because we will have three external antennas that are not inside the device itself.
Nowadays, the most normal thing is to find adapters with a USB 3.0 interface, but if you buy a low-end device, the most normal thing is that it is USB 2.0 to save costs, and, therefore, you will get lower wireless performance in terms of speed.
The most important thing is to buy an AC1200 with a USB 3.0 interface to avoid possible bottlenecks. Also, if decide to buy a USB WiFi adapter, make sure supports both frequency bands (2.4GHz and 5GHz).
Because the fact that they are dual-band does not mean that you can connect to both bands simultaneously. While routers and APs are a simultaneous dual-band (they broadcast on both bands at the same time), WiFi adapters don’t.
Yes, they can connect to both bands, but to one brand or another, not to both simultaneously, due to hardware limitations, since they do not have two chipsets inside but only one compatible with both bands.
In a minute, you’ll see what’s required to start using one, besides plugin-in and leaving.
To begin with, if you’re getting a USB wireless adapter, it’s important to check that you have a free USB port on your computer where this will plug into.
Normally, we will have to install or set up the drivers that come with the USB WiFi card itself, although if you use Windows 10, it is very likely that it will automatically recognize the WiFi adapter, and then install the drivers without user intervention.
And because you’ll notice Wireless Network Adapters especially when connected at medium-long distances from the main WiFi router or WiFi access point. So you’ll have to make sure if your PC or laptop is far away or not much from where the router is.
If you’re close to the router or AP, performance differences will be hardly noticeable compared to USB WiFi cards. But in case you aren’t, then it might be needed a bigger or better network adapter.
Last, but not least, at the time of buying a new Wireless Network Adapter, it’s important to look at the compatible Wi-Fi version and Wi-Fi class. These two work as parameters of achievable performance. Here’s a shortlist with a few examples:
Ask for a consultation and our experts we’ll contact as soon as possible!
The wireless lan terms BSS, SSID, BSSID, ESS, and ESSID are often misunderstood… But not anymore.
As a wireless user, you are only interested in broadcast SSIDs that allow you to connect to a wireless network. And as an administrator, you must also keep track of the BSSID and, to a lesser extent, the ESSID.
Does this all seem very complicated by now?
Don’t worry… In a few minutes, you will understand the difference.
A Wireless access point or simply called “access point” is a device that accepts a wireless signal from multiple other devices and retransmits them to the rest of the network.
APs may also be known as base stations. And at-home settings, a WAP may be capable of routing therefore may also be called a wireless router or wireless gateway. In a more corporate setting, AP and routers are devices separate from each other.
AP is a layer-2 device because it acts like a bridge connecting two types of networks: wired and wireless, belonging to one broadcast domain… In other words, one local network.
Basic Service Set or BSS is a group of wireless devices, that are working with the same AP.
As a user, you are generally not aware of which Basic Service Set (BSS) you currently belong to.
When you physically move the laptop from one room to another, the BSS it uses may change because it moved from an area covered by one access point to an area covered by another access point, but this does not affect the connectivity of the computer.
As an administrator, you are interested in the activity of each BSS. This tells you which areas of the network may be overloaded and helps you find a particular customer.
Basic Service Set Identifier or BSSID in short is the AP’s physical or MAC address, which is 48-bit long hexadecimal numbers. Just like your computer’s MAC address.
As a wireless user, you don’t see BSSID but it’s included in wireless packages/frames.
Most of the time, there are different BSSIDs on an access point for each WLAN configured on a radio.
By convention, an access point’s Mac address is used as a BSS identifier (BSSID). So if you know the MAC address, you know what the BSSID is—and, since all packets contain the originator’s BSSID, you can trace a packet. This works fine for an access point that has a radio and WLAN configured.
If you have an access point with 2 radios and 32 WLANs configured on each, you would have 64 BSSIDs plus the base BSSID of the access point. Individual access points are assigned to unique 64 MAC address blocks to accommodate multiple BSSIDs.
Since multiple WLANs can coexist in single airspace, each WLAN needs a unique name. This is the so-called Service Set Identifier (SSID) of your network, which is also referred to as “Network Name.”
As a user, you only care about the SSID. APs broadcast their SSID by default in their service area. They use a unique character string used to identify an AP. You can name it by any natural language like English, Spanish, or Chinese.
Your device can see the SSIDs for all available networks; so when you click on a wireless icon, it will bring up the SSIDs that the device recognizes, so you can then connect.
The SSID keeps packets within the correct WLAN, even when overlapping WLANs are present. However, there are typically multiple access points on each WLAN, so there must be a way to identify those access points and their associated clients.
For a secure wireless network, you may be required to provide a username and password.
One Service Set can be extended by adding more APs. This is called the Extended Service Set or ESS. Every AP broadcasts the same SSID to its users.
When you, as a user, walk with your device from one service set to another, you’re still connected to the same network, without knowing you changed to a different service set, as well as to a different access point.
Last but not least, is the ESSID or Extended Service Set Identifier. There’s formally no such thing as an “ESSID” in 802.11 standards. Thus, you can just use the same SSID for ESSID-shared networks.
Structured cabling solutions heavily involve the use of both horizontal and backbone cabling. These types of cabling support the existence and proper operation of entire IT infrastructures in organizations of all sizes.
Therefore, when dealing with our IT and structuring cabling needs, it is important to know the difference between the different solutions, both of them equally necessary.
There is no choosing between horizontal and backbone cabling. Instead, they coexist and complement each other, serving varied purposes.
Horizontal cabling is responsible for effectively interconnecting telecom rooms with WAOs (Work Area Outlet) or individual active workstations. The goal is to be the link between work devices and the central system.
When it comes to designing structured cabling solutions, it’s important to say that horizontal cabling doesn’t run between floors, a connectivity role that is exclusive to backbone cabling.
Horizontal cabling commonly uses CAT5e, CAT6, and CAT6a copper cables and TIA (Telecommunications Industry Association) standards demand that no more than 90 meters in cable length can be installed between the WAOs and the end-point in the telecom rooms.
On the other hand, backbone cabling enables the central IT infrastructure to operate. This cabling solution runs through facilities and buildings, floors, and telecom rooms.
The backbone method is based on the use of fiber optic cable, which is more versatile than the traditional copper cable that is present in horizontal installations. One of the main advantages of the backbone method’s fiber optic cable is the distance this cable can run between telecommunication rooms, something that is not the case with copper’s 90-meter limit.
As we saw, horizontal and backbone cabling methods serve different purposes and both are necessary for our connectivity needs. They fulfill different roles within the IT infrastructure.
If we want to get into technicalities, we will discover that these types of cabling solutions also differ in the materials they require. Because of their use and the environments they are in, the cables used in backbone installations must comply with reliability standards, making sure, for example, that they will safely tolerate a range of temperatures, support their weight, be fire-resistant, among other requisites.
Either for horizontal or backbone cabling projects, your business will need a partner it can trust. At LayerLogix, we help our clients with quality IT solutions so they can enjoy peace of mind.
We are specialists in structure cabling projects. Our team can take care of your cabling needs, successfully supporting the proper operation of your IT infrastructure.
Call us today and get a quote.
Today, you’ll learn about the ins and outs of data wiring… Shall we!?
Are you interested in building out a new internet infrastructure or looking to upgrade your business’s IT network to get a faster connection but don’t know which wires are used for data?
Let’s see what data wiring is, how it works, which types of data wires exist, and more.
In simple terms, data wiring is simply the cables that support your business’s IT infrastructure.
This includes both the design and installation of a data cabling system either for a data center or business. It’s often “wired” to computers and telephones and is used to connect to the Internet as well as to transmit audio, voice, and video communications on a private network.
Such data lines are also useful to enable IoT connectivity between workplace equipment and devices such as printers, security cameras, Wi-Fi routers, smart lighting, and thermostats, among others.
As you can guess by now, data wiring makes high-volume data/bandwidth a reality.
We could say it allows you and your team to get the work done with next-to-zero downtime, in an organized way (when properly installed and labeled, of course).
Since there are specialized network cables for different applications, there is no “one size fits all” approach to data wiring.
For example, we talked about the two major types – Cat5e and Cat6 – in our recent “UTP Cables” guide. Besides these two, there are other commonly used categories.
Different types, support different kinds of use and are governed by strict standards.
Built with a rubber outer coating, a thing glass-fiber core, and both layers of protection and buffer, these use light to transmit data over long distances, quicker than any other type.
We’re talking about 100 Gbps or higher.
The Fiber Optic category is also divided into two types of core diameters: MMF (multi-mode fiber = short reach) and SMF (single-mode fiber = long reach).
As we just mentioned, we already talked about the Twisted Pair cables, so let’s be brief.
Either shielded or unshielded, Twisted Pair cables are considerably more affordable than Fiber optic cables but don’t work too well for long distances.
Now, this is the first time we talk about Coaxial cables (or just “coax”), which are commonly used by data service companies to install both cable internet and cable television in the same building.
They transmit radio frequencies (or RF signals). That’s why they’re also used for telephones, radio transmitters, antennas, routers, and more, providing decent-enough speed of communication to each user.
It may come as a surprise, but we won’t give you step-by-step instructions on “how to install data wiring” today. On the other hand, what we’ll do, is recommend you: get any amount of data wiring you want and need from a professional who ensures reliable speed.
Why risk yourself with all the complexities, standards, and regulations that surround data wiring when you can have it done for way less (avoiding downtime and other issues)?
That is right. If you try to install data wiring yourself, then you or any of your team members would be responsible for everything, from designing and planning, adding, labeling, and removing any wiring in or off your infrastructure, without causing electromagnetic interference.
That’s what we, LayerLogix, got you covered – with ever-going support. Our experts will design and lay out your new system while anticipating your business’ future needs.
After reading today’s article and before investing in a data wiring solution, you should be able to know if you need data wiring or not. The answer is likely a big YES.
But you may be worried about how expensive it could get. So, how much do data wiring services cost?
While we cannot give you a specific amount as an answer (because the cost depends on your office’s size, the types of cabling, and the amount of bandwidth needed, among other variables), we invite you to contact us and ask for more information.
We will answer all of your questions!
Did you know, the discovery of UPT cables is accredited to Alexander Graham Bell? That makes it no surprise that the UTP wire is the most common type of copper telephone ones. Why?
Why is it that to have reliable home connectivity, everyone recommends the use of UTP cables? Let’s find out.
UTP is short for “unshielded twisted pair”. For your information, multiple pair cabling is necessary to handle multiple forms of communication in a less expensive way than coaxial cable, for example. That’s why it’s the most common type installed in residential industries.
The twisted cable pairs work by canceling electromagnetic interference from external sources (radiation, groundwater, pressure, root systems), while the wires transmit the signal.
The eight different wires are twisted in pairs of four to prevent malfunction.
As mentioned in the intro, Telephone cables, as well as “Ethernet cables”, are the most common example of a UTP cable. Security cameras can also use UTP wires to match the baseband needed to connect.
There’s another question (more like a misunderstanding) that people have about UTP cables… And that is: What is the difference between Ethernet and UTP?
Believe it or not, they’re the same. When people say the term “Ethernet cable”, they’re referring to Unshielded Twisted Pair cable, which is the more technical way of calling it.
Well, we now have a large variety of UTP cables, of different numerations. Some are rare to see nowadays (CAT3), while others dominate the market (Cat6).
Before enlisting them with connectivity details, let me explain you this:
UTP cable categories are referenced with numbers. UTP cable types are the single letters after that number to identify a variable. Now, scroll down to see what we’re talking about.
Now, if you’ve heard about UTP cables then you may or may not have heard about STP cables. What is the difference between these two?
Well, the “Unshielded Twisted Pair” lacks metallic shielding around its copper wires, minimizing electronic interference with its balanced signal transmission. But cable damage and interference are more likely to occur due to its bending and stretching nature.
Now, “Shielded Twisted Pair” cables provide even greater EMI and radio frequency protection. Therefore, STP cables are more expensive and harder to install than UTP cables.
After reading this – Have you found out what category, type, and shield-variable do you need for your business?
Don’t worry if you don’t.
Because we’ll be pleased to help you further, as we did with this article, by answering one-to-one questions.
Get a quote and ask us anything!
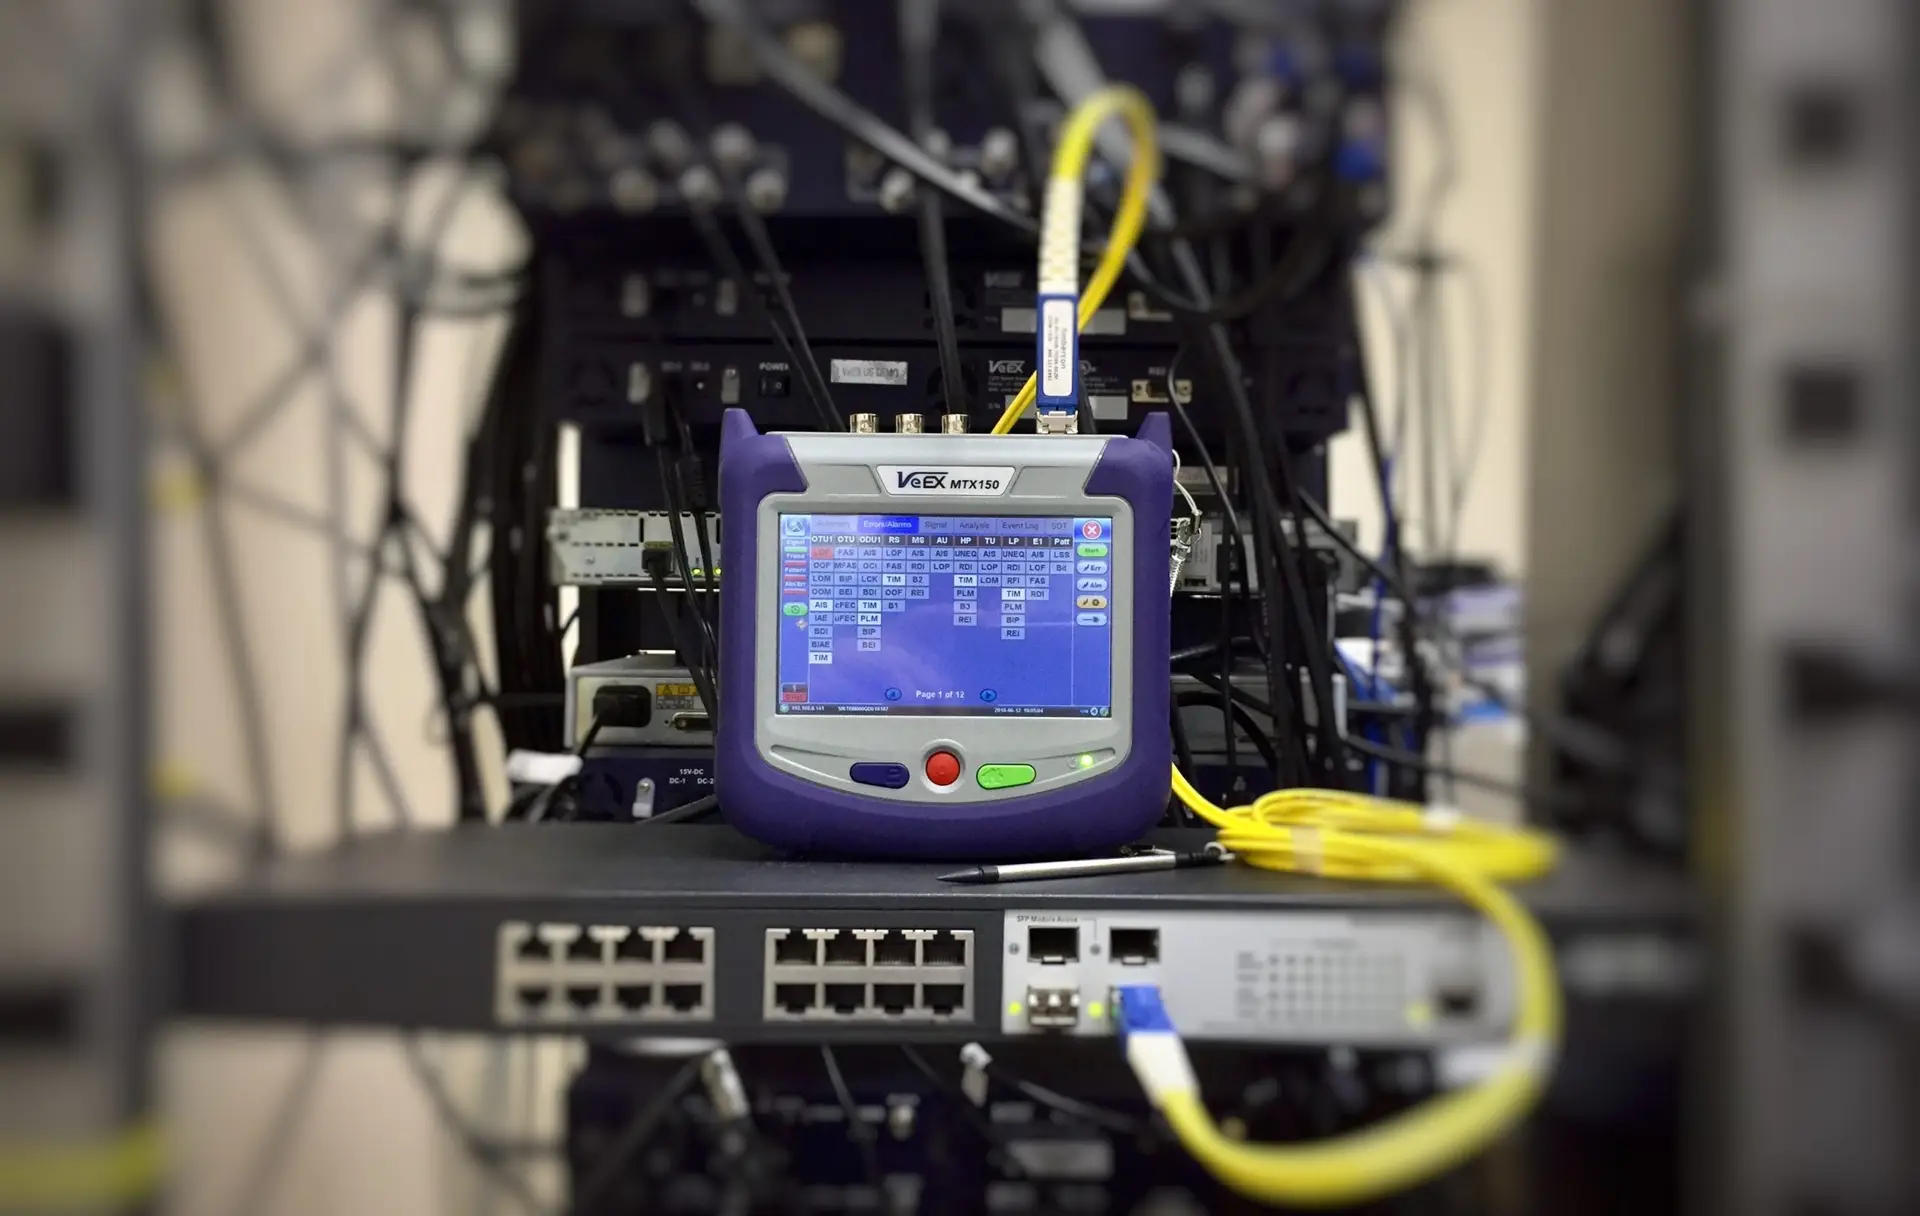
Would you like to know what does it take to test network cabling? You’re in the right place.
Network cabling testing is the proper way to keep quality control of recently made/installed cables and network systems, as well as a troubleshooting mechanism for already existing cable network systems.
So, scroll down to read more on how to test network cabling. There will also be a checklist at the bottom end.
Not everyone can test network cabling. We make this clear now so you can stick with it.
Network cabling tests are the method of assurance that these stand up to high qualifications.
The standardization of professional tools and knowledge required for the task is pushed forward at the same speed that newer, better-performing cables are invented. Other tests also focus on the electrical and connectivity/conductivity levels, as well as frequency supportiveness and structural integrity.
The Telecommunications Industry Association (TIA) and/ or the International Organization for Standardization (ISO) are the main binary Certification-level testing systems applied in North America. The cable or network has to either pass (meet the standard) or fail (don’t).
Because both the voltage run and electrical systems are different in Europe, Great Britain, and some other countries in the world, the standards are also different (being the International Electrotechnical Commission (IEC) guidelines the most popular outside of NA).
To start testing network cabling, you’ll need testers referred to as “analyzers”. These tests the previously mentioned parameters at different levels to make sure everything is OK.
If any problem arises in the network cabling system or, if you just want to test the signal strength and speed, then you’ll have to use “Qualification” and “Category” testers, which work a little bit differently. This is what internet companies use to guarantee and advertise certain speeds.
On the other hand, those so-called “Verification” testing tools are mainly used to make sure all connections inside the network system are solid (“degeneration of preexisting systems”).
Is this the first time you encounter this challenge?
Well, if you kinda know what you’re doing and have the tools, then I would encourage you to give it a try until you understand how everything works.
But if you’re here, reading this today… It’s very likely you don’t know about it, that you don’t have the tools nor the time! Why not leave it to the experts? To us, LayerLogix.
Are you worried about fiber optic cable damage? You should be.
Because while they’re perceived as the best and safer option in their product line, fiber optic cables still are fragile and can cause data outages when installed or treated incorrectly.
Even worse, fiber optic repairs take weeks and require specialist equipment and skills.
So, let’s see what are the reason why fiber optic cables break and what you can do about it.
Optical fiber can break for a couple of reasons. Accidental breaks (especially cable damage surrounding new construction areas) are the most common and just as damaging as the other reasons we’ll mention below.
Newer companies have tried to solve it, avoiding this kind of incident by placing the cables inside conduits like gas pipelines, but besides pre-installation bad treatment, nothing harms fiber optic cabling as the force of nature.
Earthquakes, hurricanes, and tornados, among other natural disasters, can cut or destroy entire fiber optic cabling if it doesn’t just cripple connectivity.
And despite what people think, rain, cold and extreme heat can affect traditional electrical signals but do not have any effect on fiber optics.
Yes, it can be repaired, when it is in the hands of a skilled team of specialists who carry fiber-splicing and terminating equipment and of course, know how to use it.
In the case it’s not cut, the damaged section is removed. Then, the remaining fiber sections are spliced with caution. These are the two most frequent methods used to splice optical fiber cables:
Fiber cuts are costing big money companies (especially telecom).
According to the NTDPC, $75,000 per mile is how much fiber optic cable costs to bury in rural areas (on average). Fixing fiber optic cables of that longitude can cost as much. So far, $92,000 was the biggest reported amount spent by one telecom company on repairs of this kind. In that year alone, telecom companies paid an estimated $600 million in repair costs.
But the real financial weight comes from indirect costs (like business closures), representing an estimated loss of $18 billion that year, as well. That’s a 100x increment of an already painful sum.
The hard-earned lesson? Minor incidents with a relatively minor fallout can, unfortunately, lead to much bigger problems, due to how much it affects end-users. In the worst-case scenario, your business has impacts on public health and emergency services (police departments, fire stations, and EMTs) who force or even stop completely their operations.
But even if that’s not the case, the snowballing of minor fiber optic cable damage to the major issue could come from customers’ canceled services for failing to provide constant and reliable support.
What can you do about it?
To ask us questions you and/or your team have, make sure your current structured cabling is in good health. Or, let the experts handle it in the case of a first installation.
Fiber optic cabling supports most of today’s world’s internet, cable television, and telephone systems. But not many people know what are they and how do they work exactly.
This is why we decided to write this article.
We’re sure you understand inside these and how to make the best out of them after five minutes of reading.
First of all, fiber optic cabling contains strands of glass fibers, each slightly thicker than human hair, inside an insulated casing.
Each strand’s center is called core and works as the pathway for light to travel, with the help of cladding, a layer of glass that surrounds it and reflects light inward to avoid loss of signal.
There’s also the plastic/rubber boot (which starts the transition from the cable to the connector) to support bendability to the case to prevent strains on the cable, as well the connector, a plugin/ locking mechanism grabbed onto when installing or removing the cable.
Last but not least, the ceramic, plastic, or stainless-steel ferrule is the outgoing portion of a fiber connector used to house the end of the fiber to align with the transceiver or another fiber.
While single-mode fiber generates light through thin glass strands and lasers; multi-mode optical fiber cables use LEDs for the same purpose.
Maybe you’ve read or heard this already. Might even be the reason why you’re here today.
But compared to wired cables, fiber optic cabling is made for long-distance, and to provide high-performance data networking and telecommunications (higher bandwidth and transmit data).
Fiber optics support higher network bandwidth capacity (up to 100 Gbp/s) and strengthen the signal, also making it less susceptible to interference.
Now, the only downside is the fragility of its glass. This is why companies that distribute fiber optic cabling ship out the product in one piece with plenty of preparation. “Fragile” alerting stickers are the very least you’ll see on its packaging material
This is why, we also want to mention some of the best practices for handling fiber optic cables, because you’ll definitely need to handle these with care.
Will you or someone else take care of its installation? Doesn’t matter. You better leave the cables inside the box and boxes in a safe place until they’re ready to be used, to avoid potentially damaging situations.
Once that you take the fiber optic cables out of the package and start the installation, make sure to leave the end-caps that protect them until you will plug each cable into the transceiver or patch panel.
They’re built to protect the most sensitive part of the fiber, so once the glass runs through its center, it immediately gets exposed to the surrounding contaminants.
Have you been tempted to pinch or kink the fiber cable for some reason? You better don’t, because it will cause the glass to snap.
In the case you’re doing the installation yourself: don’t forget to follow the manufacturer’s recommendations.
But remember LayerLogix is here in the case that you can’t install the fiber optic cabling on your own.
We’ve been doing it for a long time now, with high success and customer satisfaction rate.
While so many exciting technologies like the cloud or the Internet of Things are emerging and wireless network connectivity already exists, we surely know cabling won’t go away.
It is and will keep being an essential component of all IT environments.
And because cabling systems are what mostly stay longer in your home or business infrastructure, you must understand what differentiates different types.
Let’s see how these cabling methods (point-to-point cabling and structured cabling) compared to each other.
Point-to-point cabling is a data center cabling system made of “jumper” fiber cables connecting a switch, server, or storage unit to another switch, server, or storage unit.
This is mostly the best option if you only need a small number of connections because point-to-point cabling lacks the flexibility needed for making additions, moves, or changes to the infrastructure when the number of connections in a data center increases.
End-user terminals of the first-built data centers are connected via point-to-point connections. Back then, growth or reconfiguration wasn’t considered a pressing reality. But in current times, where new computing equipment is always added, these result in complex and costly cabling chaos, therefore becoming a non-viable option for those who own more than two server cabinets.
However, with the use of Top-of-Rack (ToR) and End-of-Row (EoR) equipment mounting options, reliant on P2P cables, point-to-point cabling could survive for some time. But at what cost?
It’s still not as good as structured cabling, the currently most-used option. This is because it offers the flexibility, reliability, and manageability required for today’s networks.
With structured cabling, on the other hand, this network of cables, equipment, and management tools enables the continuous flow of data and wireless communications.
They use distribution areas to provide flexible connections between equipment. With it, you can connect switches to servers, servers to storage devices, or even switch to switches.
Structured cabling is designed to meet EIA/TIA and ANSI standards of design, installation, maintenance, documentation, and system expansion, to reduce risk and costs in constantly expanding, complex IT environments.
Have you ever thought about moving your business to a new location?
Fortunately, structured cabling is also easier to move or to add and change what’s on your business’ data center or server room.
Structured cabling can be dissembled and reassembled with more ease than point-to-point cables.
It’s not only its flexibility of transportation that makes structured cabling the best option for all growing businesses (especially those that already feel the growing pains of data network’s limitations), but also its considerable performance and support of future technologies.
So, on the whole, and in a few words, point-to-point cabling still exists for the smaller businesses that don’t need much of anything. While structured cabling offers more of everything… Of course, at a greater price.
If you consider how much it facilitates and improves maintenance, expansion, and performance, you shouldn’t think about the cost that represents now, but of how much you’ll save in the future.
Now that you know the differences between Point-to-Point Cabling vs. Structured Cabling…
Are you ready to make a choice?
We’re ready to answer any cabling-related questions and to help you with any connectivity issue you’re having.
So many business organizations and individual users commit structured cabling installation mistakes which you should avoid to not compromise the quality of connection and instead, enjoy a seamless experience.
We will explain today what IT engineers and other technicians miss during the structured cabling installation process.
You start building a business by planning extensively, availing yourself of benefits for years to come, right?
This also applies to structured cabling installation.
But for some unfortunate reason, people have made the mistake of not planning the room requirement for wire connections, as well as the number of required ports, ideal cable according to need, and ideal speed for every connection.
Some commit the gravest mistake of no planning at all.
Everything should be properly labeled and set up to become easily accessible or removable, even if this requires upgrading your system or moving portions of it to a different, more convenient location in your facility.
Trying to save their money in here is to spend it after a few months, on maintenance or reinstallation. It only shows a lack of knowledge and expertise.
Maybe you did or didn’t know, but structured cabling networks are sensitive to the environment and could be disrupted by hot/humid, cool/dry, as well as magnetic and electromagnetic fields.
If the technician doesn’t think about this early enough and does not use proper equipment to adjust the atmosphere, these might end up disturbing the connection.
Believe it or not, there are laws, standards, permits, inspections, and codes out there for inside/outside cable to consider at local and federal levels.
Breaking any of these can result in costly fines, networking changes, and safety issues.
Because they change from state and country, what we recommend you is to learn about legislation through knowledgeable IT specialists and to comply with them from the beginning.
On occasions, structured cabling installation could take longer than expected.
Even in the case of tiredness, the last step in the installation process must always be, to check the health of the connection.
Are you committing this and similar structured cabling installation mistakes?
You’re not alone! It’s impressive the amount users and technicians that don’t do that, ending up in future performance issues (in the worst case, leading to work being re-done).
So that extra work is always worth it!
Structured cabling installation is not something you should afford yourself to neglect.
Even in the case that you want to do it yourself or let other non-technician relatives do it for you can also result in the costly purchase of new equipment and fees of post-effort maintenance.
Instead, what if you let the experts handle it this time?
It’s your safest bet to talk with us – We’re available at all times to attend to your needs.